Easy Guide to Roku Smart TV Setup
Setting up a Roku Smart TV is a straightforward process that opens up a world of entertainment at your fingertips. Whether you’re gearing up for a marathon binge-watching session or simply aiming to catch up on the latest news, having a properly configured Roku Smart TV ensures you get the most out of your viewing experience. This guide walks you through every step, making the setup process as smooth as possible.
Roku Smart TVs are known for their robust and user-friendly features, allowing you to seamlessly access thousands of streaming channels, including popular services like Netflix, Hulu, and Disney+. The intuitive interface is designed to make navigation simple, even for those who aren’t tech-savvy. By correctly setting up your Roku Smart TV, you ensure optimal performance and access to a comprehensive array of entertainment options.
A key element of the Roku experience is its ease of use. From the moment you unbox your Roku Smart TV to the time you start streaming your favorite shows, the process is laid out clearly to minimize frustration. The initial setup involves straightforward steps like attaching the base or mounting the TV, connecting necessary cables, and getting online. Once powered on, you’ll be guided through on-screen instructions to connect to the internet, set up a Roku account, and download essential software updates.
As you customize your Roku Smart TV, you’ll have the ability to tailor your home screen, add desired channels, and set parental controls where needed. This customization ensures that your TV aligns perfectly with your viewing preferences, making it a personalized entertainment hub.
However, even with its simplicity, setting up any tech device can come with its fair share of hiccups. That’s why we’ve included troubleshooting tips for common issues you might encounter. From resolving connectivity problems to conquering account and login issues, and handling software or channel installation errors, this guide covers it all.
By the end of this guide, you’ll be equipped with all the knowledge you need for a seamless Roku Smart TV setup. Let’s dive into the simple yet detailed process that will transform your entertainment experience in just a few steps.
Introduction to Roku Smart TV Setup
The Roku Smart TV marks a significant leap in the world of home entertainment, merging the benefits of traditional television with advanced streaming functionalities. Designed with an emphasis on simplicity and performance, the Roku Smart TV provides users access to a plethora of streaming services, including Netflix, Hulu, Disney+, and countless others. This robust offering, combined with an intuitive interface, makes Roku Smart TV a favorite among entertainment enthusiasts.
Overview of Roku Smart TV and its Features
Apart from the abundant streaming options, the Roku Smart TV offers various unique features:
- User-Friendly Interface: The interface is designed to be intuitive, catering to all age groups.
- Vast Library of Channels: Access to thousands of channels, covering everything from movies to sports.
- Voice Control: Use voice commands to search for content, control the TV, and more.
- Customizable Home Screen: Arrange your favorite channels and apps to your liking.
- Regular Software Updates: Ensuring your TV has the latest features and security patches.
Importance of Proper Setup for an Optimal Viewing Experience
Proper setup of your Roku Smart TV is crucial to fully enjoy its capabilities. If configured correctly, you will benefit from:
- Enhanced Picture Quality: Optimal settings can drastically improve the image quality, providing a cinematic experience at home.
- Seamless Streaming: Reliable connection setups ensure buffer-free streaming, maintaining uninterrupted entertainment.
- Personalized Experience: Customizing your channels and settings allows for a more tailored and enjoyable viewing experience.
- Security and Updates: A proper setup ensures timely software and security updates, keeping your device safe and up-to-date.
Brief Mention of the Simplicity and User-Friendliness of Roku’s Interface
One of Roku’s standout features is its user-friendly interface, designed for simplicity and ease of use. The Main Screen welcomes you with a clean and organized layout, ensuring that even first-time users can navigate through their options without a hitch. Menus are straightforward, and the rich visual interface reduces the learning curve significantly.
Here’s why Roku’s interface is celebrated for its simplicity:
- Streamlined Navigation: From setup to daily use, the Roku interface guides you seamlessly.
- Quick Search: Roku’s search functions are fast and efficient, allowing you to find your favorite content quickly.
- Easy Customization: Personalized home screens mean you can organize your channels as per your viewing habits.
- Informative Icons: The use of clear and concise icons simplifies decision-making.
- Assisted Setup: The guided setup process makes it easy, even for tech novices, to get started without any hassle.
These elements collectively ensure that your transition to a Roku Smart TV is smooth, making it an excellent choice for enhancing your home entertainment setup.
Ready to delve deeper into setting up your Roku Smart TV for a flawless experience? Check out Roku’s official setup guide for more detailed instructions.
Our next section will walk you through a step-by-step guide to setting up your Roku Smart TV, ensuring every detail is covered to maximize your viewing pleasure.
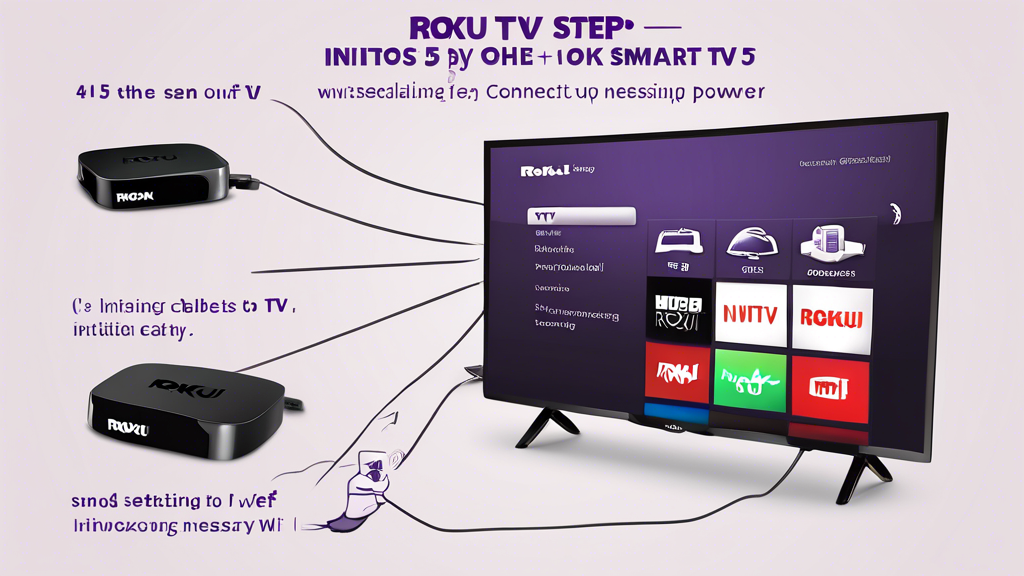
2. Step-by-Step Roku Smart TV Setup Guide
Unboxing and Physical Setup
Getting your Roku Smart TV ready starts with the unboxing process. Here’s how you do it:
- Open the Box: Carefully unbox your Roku Smart TV and lay everything out on a flat surface.
- Inspect Components: Ensure you have all the components: TV unit, remote control, power adapter, base stand or wall-mounting kit, and user manual.
- Attach the Base: If you plan to place your TV on a stand, follow the instructions to attach the base securely. Use the screws provided.
- Wall Mounting: If you prefer wall-mounting, refer to the mount’s manual to attach it to the wall securely.
- Connect Power and HDMI: Plug the power adapter into the TV and an electrical outlet. Connect your HDMI cables from external devices like a Blu-ray player or gaming console to the TV.
Initial Power-On and Internet Connection
Once the physical setup is complete, it’s time to power on your Roku Smart TV and connect it to the internet. Follow these steps:
- Power On: Turn on your TV using the remote control or the power button on the TV.
- Initial Setup Screen: You will be greeted by a setup wizard. Select your preferred language using the remote.
- Connect to Wi-Fi: Navigate to the network settings. Choose your Wi-Fi network, enter the password, and connect. If you prefer a wired connection, plug the Ethernet cable into the TV.
- Preliminary Settings: Complete other initial settings like screen resolution and location permissions by following the on-screen prompts.
Software Updates and Sign-In
Keeping your software up-to-date ensures that you have the latest features and security updates. Here’s how to do it:
- Check for Updates: Once connected to the internet, the TV will automatically check for software updates. If any updates are available, follow the on-screen prompts to download and install them.
- Create/Sign into a Roku Account: If you don’t already have a Roku account, now is the time to create one. Visit Roku’s official website or follow the link provided during the TV setup. Fill in the required details and sign up. If you have an existing account, simply sign in.
- Link Device: You will be prompted to link your Roku device to your account. Visit the provided link on a computer or mobile device and enter the code displayed on your TV screen.
Channel Setup and Customization
Now that your TV is online, you can start adding your favorite streaming channels and customize your home screen to suit your preferences:
- Add Channels: Use the remote to navigate to the Roku Channel Store. Browse or search for channels you want to add. Select the channel and click ‚Add Channel.‘
- Customize Home Screen: Rearrange or remove channels on your home screen by highlighting the channel, pressing the star (*) button on the remote, and selecting your preferred option.
- Set Parental Controls: Navigate to ‚Settings‘ > ‚Parental Controls‘ to restrict access to specific content. This helps ensure a safe viewing environment for children.
Following these steps will have your Roku Smart TV set up in no time, enabling you to dive into the streaming world effortlessly. Enjoy streaming your favorite content on your new Roku Smart TV!

3. Troubleshooting Common Setup Issues
Connectivity Problems
Experiencing connectivity issues during your Roku Smart TV setup can be frustrating, but these common problems often have simple solutions. Here are some typical connectivity issues and how to address them:
- Wi-Fi Connection Issues
- 🔄 Restart your Router: Power cycle your router by unplugging it for 30 seconds and then plugging it back in. This can often resolve temporary connection glitches.
- 📶 Check Signal Strength: Ensure your Roku TV is within range of your Wi-Fi router. You can also try to reduce interference from other devices.
- 🔌 Re-enter Wi-Fi Credentials: Double-check that you entered the correct Wi-Fi network name (SSID) and password. Make sure there are no typos or mistakes.
- 📱 Mobile Hotspot: If your router still doesn’t connect, try using a mobile hotspot to see if the Roku TV can connect. This will help determine if the problem lies with your home network.
- Ethernet Connection Issues
- 🔌 Check Cable: Ensure the Ethernet cable is securely plugged into both the Roku TV and the router.
- 🌐 Router Settings: Confirm that your router is configured to allow wired connections. Some routers have settings that disable Ethernet ports by default.
- 📦 Test the Cable: Test the Ethernet cable with another device to ensure it’s functioning correctly. If it works elsewhere, the issue may be with the Roku TV.
If your Roku Smart TV isn’t connecting to Wi-Fi:
If you’re using an Ethernet connection but it’s not working:
Account and Login Issues
Setting up your Roku account is essential for full functionality. Here are some common issues and their troubleshooting steps:
- Forgot Password
- ✉️ Reset Password: Go to the Roku account recovery page and enter your email address to receive a password reset link. Follow the instructions in the email to reset your password.
- Account Activation Problems
- 🔗 Access the Activation Link: Ensure you are entering the correct activation code at https://my.roku.com/link. Double-check for any typographical errors.
- 📧 Check Your Email: If you’re not receiving an activation email, check your spam or junk folder. Also, ensure that you’ve entered the correct email address during the setup process.
- 🆕 Create a New Account: If activation issues persist, consider creating a new Roku account using a different email address to see if the problem resolves.
- Roku Account Verification
- 📤 Resend Verification Email: Log into your Roku account, and if you’re prompted to verify your email, click on Resend Verification Email. Follow the instructions provided in the email.
- 📞 Contact Support: If resetting and re-sending fail, it might be time to contact Roku customer support for further assistance at Roku Support.
If you can’t remember your Roku account password:
If you’re having trouble activating your Roku account:
If your Roku account isn’t getting verified:
Software and Channel Installation Errors
When setting up your Roku Smart TV, you may encounter software update failures or channel installation errors. Here’s how to troubleshoot them:
- Software Update Failures
- 🔄 Restart Your Roku TV: Unplug your Roku TV for about 10 seconds, then plug it back in and try the update again. This can resolve temporary software issues.
- 📶 Stable Internet Connection: Ensure your internet connection is stable. A poor connection could interrupt the update process.
- 🛠️ Manual Update: If automatic updates fail, you can try checking for updates manually through Settings > System > System Update.
- Channel Download and Installation Issues
- ⬇️ Retry Installation: Sometimes, simply retrying the installation can work. Go to the Streaming Channels menu and try adding the channel again.
- 💾 Check Storage: Ensure your Roku TV has enough storage space for new channels. You can manage storage by removing unused channels.
- 🔍 Check for Updates: Ensure both your Roku software and the channel in question are updated to their latest versions. Sometimes, outdated software can cause compatibility issues.
If your Roku TV fails to update its software, try these steps:
If you’re encountering issues while adding or installing channels:
Setting up a Roku Smart TV is designed to be a hassle-free and intuitive process, ensuring users can quickly dive into their favorite shows and streaming content. From the initial unboxing to final customizations, the steps provided in this guide cover every aspect needed to get the most out of your Roku experience.
The process begins with unboxing and setting up the physical components, including connecting the power and HDMI cables, which sets the stage for a smooth installation. Once the TV is powered on, navigating through the initial setup screens and establishing an internet connection is straightforward, whether using Wi-Fi or Ethernet. This connection is crucial for downloading software updates, which are essential for accessing the latest features and improvements.
Creating or signing into a Roku account is the next critical step, involving linking the device to enable access to the extensive range of available streaming channels. The guide also highlights how to personalize your experience by adding and arranging channels on the home screen, setting up parental controls, and other customizations to cater to individual preferences.
Despite the user-friendly design, some users may encounter common setup issues such as connectivity problems, login issues, or difficulties with software updates and channel installations. The guide provides practical solutions for these problems, ensuring that even those less familiar with tech can troubleshoot effectively and continue with their setup.
Conclusively, this comprehensive guide ensures that by following these step-by-step instructions, users can achieve an optimal setup of their Roku Smart TV. With this solid foundation, the seamless interface and extensive streaming options that Roku offers will provide a satisfying and enjoyable viewing experience, cementing the Roku Smart TV as a central entertainment hub in any home. For further assistance, Roku’s official support page can be a valuable resource: [Roku Support](https://support.roku.com).